View RSS Feed

melev

A fancy upgrade to my RO/DI setup

Rating: 5 votes, 5.00 average.
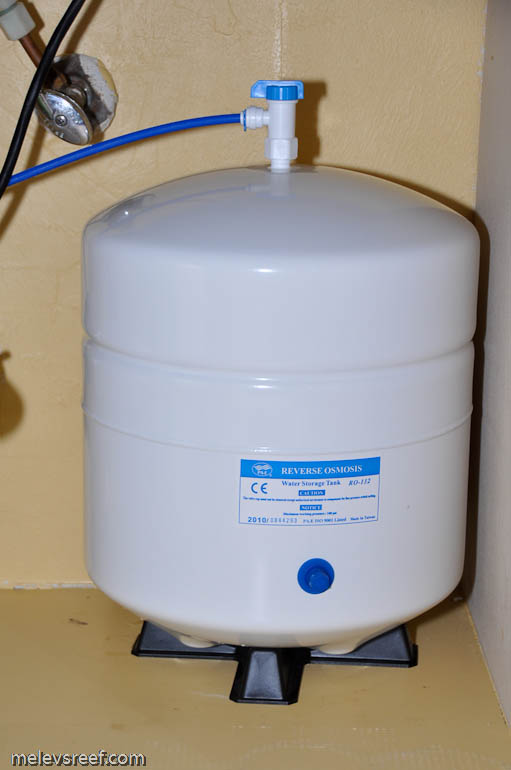
Six months ago, I ordered two components for my drinking water, and yesterday it was finally installed. The first was a bladder tank. This holds the drinking water (RO water, not RO/DI) under pressure for quick on-demand water use. It holds 3g of water, so I can use it to make coffee, ice tea, and fill up water bottles like the wind.

Blue tubing was run from the RO system behind the refrigerator and dishwasher to the bladder tank under the sink. A small hole had to be drilled through the wall from the utility room into the the area behind the fridge.


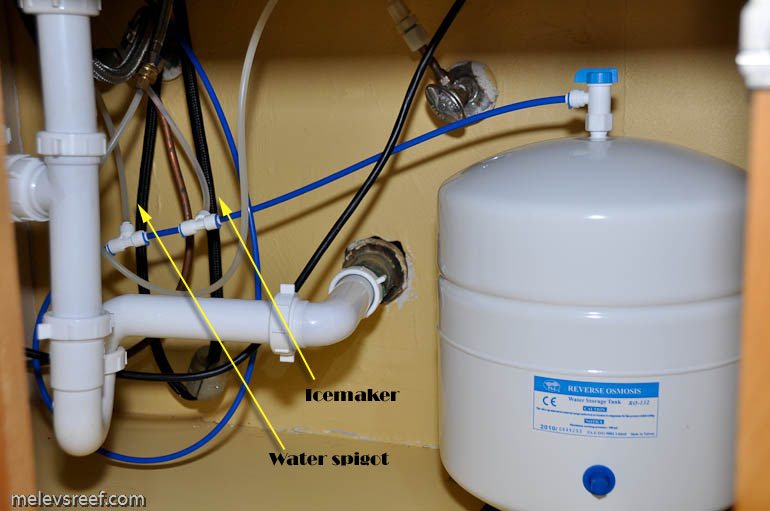
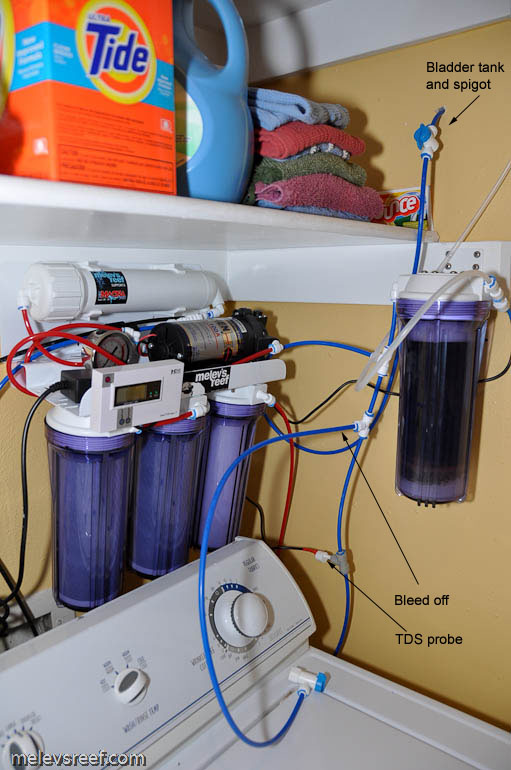
The RO tubing and JG Tee fittings made connecting it quite easy. In this next picture you can see how the blue tubing that leads from the left side of the cabinet to the bladder tank. The two clear lines going upwards feed both the spigot and the fridge's icemaker.


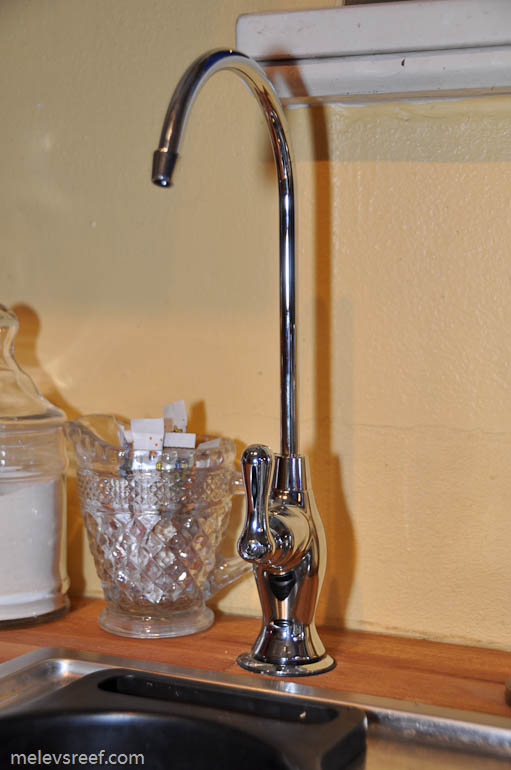
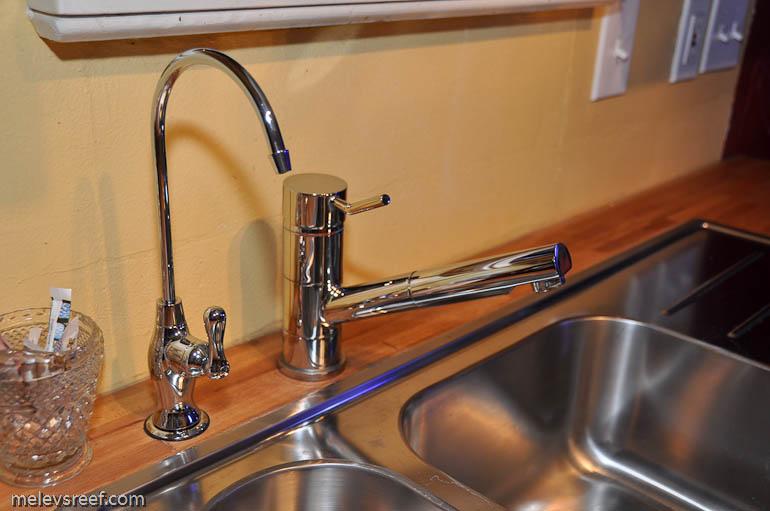
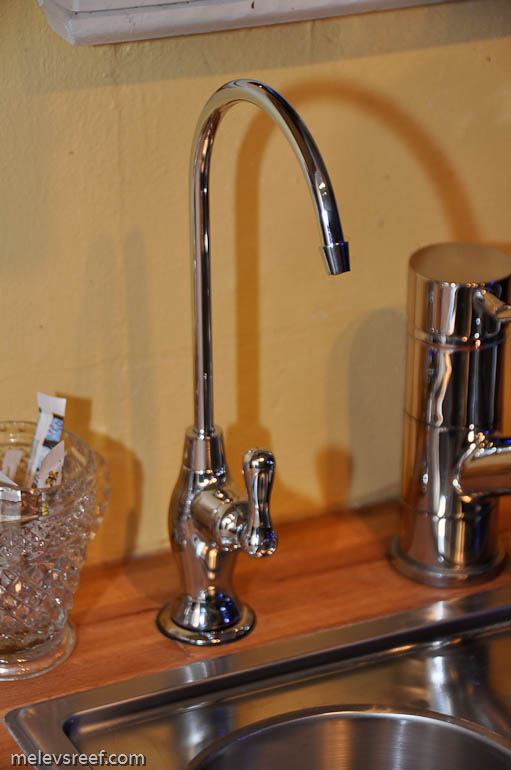
The second part was this spigot. I've seen the cheaper kind, but didn't like the look. This one accents the sink better.


I had to drill a 9/16" hole in the countertop for the spigot, which then is secured from below with a nut. A quarter turn of the handle is all it takes to get pure water at full strength.


The RO/DI system got a little more complicated with even more tubing tied in. The valve up high on the wall is open to fill the bladder tank, and closed when making DI water for the reef. The bleed off line is to toss out the first minute's worth of water to avoid wasting DI resin to TDS creep.


The bladder tank doesn't need electricity to run, it is a self-contained pressurized system. The one rule you must remember it to close the valve to avoid sending pressurized water through the DI resin. That's it. I'm using an inline ball valve in the image above, but you can turn the handle on the top of the bladder tank instead to get the same results.

This upgrade kit will be added to my online shop page in the future.

Submit "A fancy upgrade to my RO/DI setup" to Digg Submit "A fancy upgrade to my RO/DI setup" to del.icio.us Submit "A fancy upgrade to my RO/DI setup" to StumbleUpon Submit "A fancy upgrade to my RO/DI setup" to Google

Updated 10-28-2011 at 09:59 AM by melev

Tags: bladder tank
Categories
Equipment , ‎ melevsreef

Comments

Page 1 of 2 12 LastLast
  1. evoracer's Avatar
    Good to know about shutting off the pressure tank before making DI. I run a similar setup, minus the spigot. My fridge has water and ice dispensers built in. I valved every spot I could to be able to isolate any potential leaks and remove any component I needed to for service already, like a good little reef plumber.
    My entire RO system is under the kitchen sink including the pressure vessel, and the DI is in the garage. So I think in will make myself a big note next to the DI container reminding me to shut off that pressurized line!
  2. Jnarowe's Avatar
    BTW guys, you can also get a re-mineralizer for the drinking water. This in effect puts back in a lot of the flavor. Great for making coffee etc. You'll find that RO water is fairly unstable. If left out in a glass the flavor can change rapidly because there are not enough buffers. Studies show that minerals in water do nothing for us physiologically, but they sure do taste good!
  3. evoracer's Avatar
    Well considering the clean RO leaves my unit at ~25 TDS (incoming in ~750), my RO actually tastes pretty good!
  4. melev's Avatar
    I've been drinking RO water for as long as I've had an RO unit. I don't leave it out, it is in the fridge bottled usually. I could add a Taste filter, but I really don't see why I'd want that now all of a sudden. I've never had any complaints from others that visited and drank the water. Rather, they said it tasted great.
  5. chuck's Avatar
    cool upgrade Marc. How does the tank work? Is it filled with air to push the water out of the faucet?

    I am still battling with where and how to install mine. We have a 2 story house and nothing is close to anything else. I would love to hook it up to the ice maker and our water cooler but they are on opposite walls. (HEAD BANG) The laundry room is in the middle of the house.

    I sure am glad you posted this! A light bulb just came on as I was typing. The dang ice maker has plumbing and it is on the same wall as my water cooler. problem solved!!!!

    I JUST LOVE THIS SITE!!!!!
    Updated 10-28-2011 at 03:42 PM by melev (this is not a forum. ;))
  6. Jato460's Avatar
    my RO filter came from home depot as a drinking water system with a pressure tank and I don't use a DI stage but I do want a DI add on stage.
  7. melev's Avatar
    Chuck - sounds like you figured out a solution. The bladder tank has a rubber bladder inside of it. It is filled up with air to a specific PSI. As water is added to the holding tank, the bladder compresses. Each time a valve (or icemaker) is opened, the bladder expands to force water quickly out of the blue tubing to the spigot (or icemaker). Does that make sense?

    Jato - You can add a DI stage after the RO section using a Tee and a ball valve. You will need an inline ball valve as pictured above to shut the pressurized line from the bladder tank.
  8. chuck's Avatar
    Will I need that tank for my Icemaker to hookup to my RO/DI filter or will it work without it?

    Yes that makes sense how it works.
  9. chuck's Avatar
    Marc do you have more than 1 RO system in your house? behind the fridge and in the laundry room
  10. melev's Avatar
    Yes, you would need it for the icemaker because water output is slow out of an RO system - much too slow to fill up an ice cube tray with the built in timer relay (assuming that is how it knows when a tray is full).

    I'm only using the one system, the one you saw pictured above.
  11. marks69's Avatar
    put a check valve after the di take off and you can always leave it on, works on my set up
  12. melev's Avatar
    That doesn't make sense to me.
  13. evoracer's Avatar
    Check valve wouldn't help the situation at hand, ie pushing pressurized water into the DI. If there were some sort of pressure reducing valve, like a fixed orifice tube, that would work, so long as the pressure out of the tank was constant.
  14. SaltCritters's Avatar
    Why can't you have pressurized water going into the DI?
  15. marks69's Avatar
    my di is t'd off then there's a check valve to prevent the water from the tank getting mixed with the di water. no backflow. didn't mean after the di, sorry
  16. melev's Avatar
    Quote Originally Posted by SaltCritters
    Why can't you have pressurized water going into the DI?
    The water moves too quickly through the resin. DI resin needs contact time. If the system has a 100gpd membrane, contact time is at best 4.16g PER HOUR.

    With a bladder tank, it rushes through much too fast. I've not figured out the math yet to be more specific.
  17. melev's Avatar
    Quote Originally Posted by marks69
    my di is t'd off then there's a check valve to prevent the water from the tank getting mixed with the di water. no backflow. didn't mean after the di, sorry
    I think I understand... sort of. Can you spell it out, including flow direction? Others might be interested.

    To update my own situation, the icemaker isn't working right. Perhaps the water pressure supplied by the house's plumbing operates the mechanics? I'll have to ask Bobby since at this point I have no ice at all.
  18. SaltCritters's Avatar
    we have a BRS 300gpd system and I've had my pressure tank feeding the DI for years. Still getting 0tds on 11 month old di resin
  19. DJ in WV's Avatar
    Marc he has a check valve between the t ( that is between the ro and di unit) and the bladder tank which allows water to enter the badder tank but not back feed to the di when the valve is opened on it for tank water. It removes your manual valve. I think this what he talking about , and is the way I have mine set up
  20. melev's Avatar
    That makes sense. So the line from the bladder tank has another Tee or two Tees to feed a water spigot and the icemaker in the fridge.
Page 1 of 2 12 LastLast