View RSS Feed

melev

Custom Auto Top Off Reservoir

Rating: 14 votes, 4.79 average.
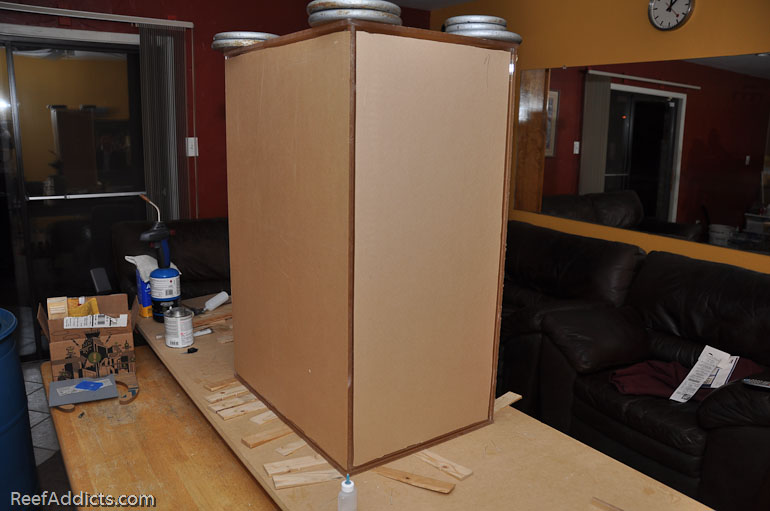
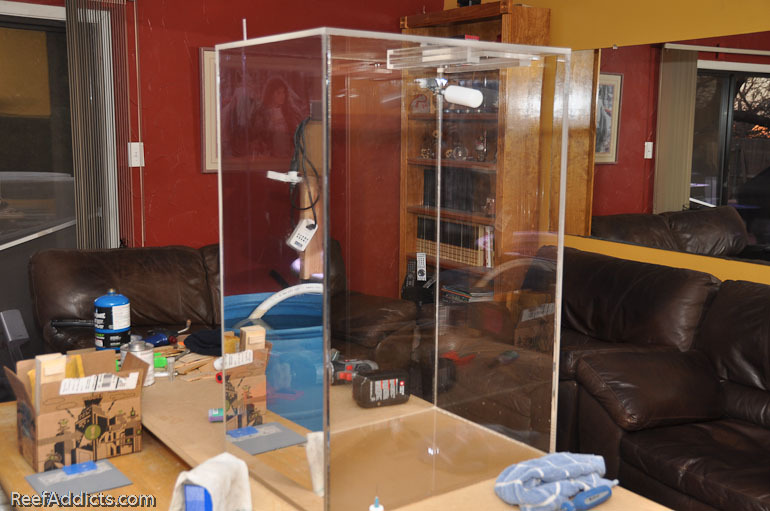
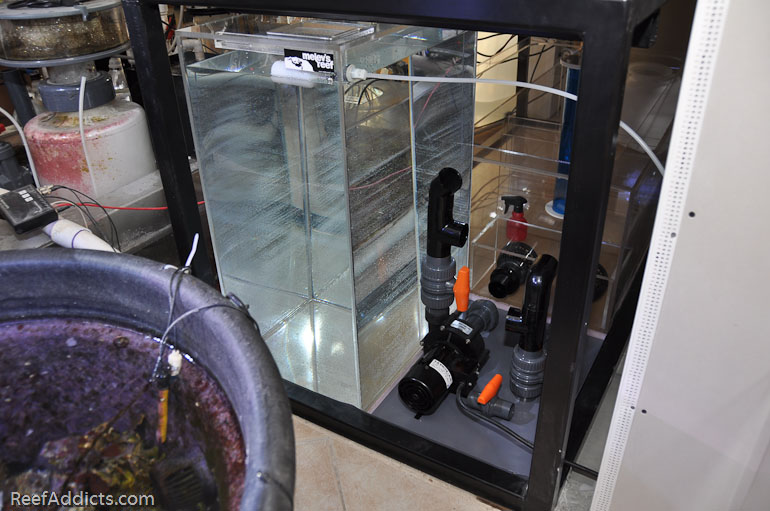
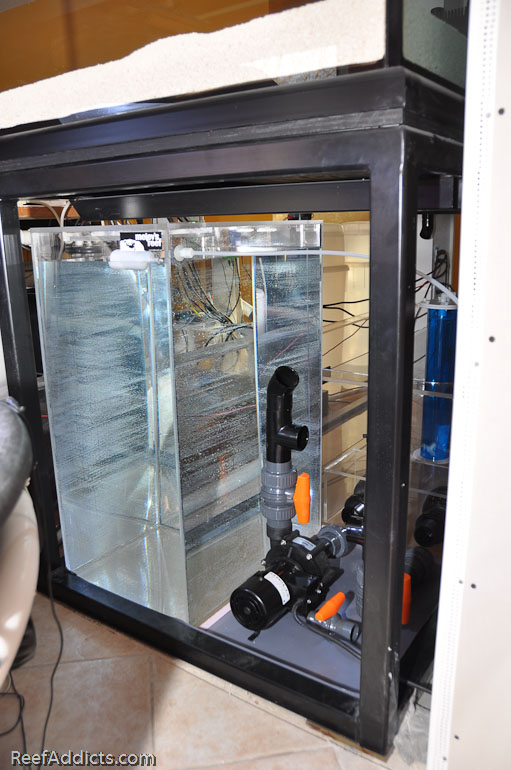
For years, I've used wrapping paper containers to hold 20g of RO/DI water for my reef's evaporated needs. With the new tank, I decided it would be sexier to put a custom-made acrylic vessel under the tank. I measured twice, opting to use every inch at my disposal, and proceeded to build it. The reservoir is 22" wide, 32.75" tall, and 15.5" deep. It has a small access door on the top to allow me to adjust the float valve when needed. It is made with 3/8" AcryLite GP.

The purpose of the reservoir is to have a week's worth of water on hand, and leave the RO/DI system off until it needed to be refilled. If the entire reservoir drained into my sump at once, it doesn't have enough water to affect salinity detrimentally. If I ran the RO system directly to the sump with a float switch, the consequences would be far worse -- until I finally got home and noticed it. I strongly recommend against that method, both for the risk to your home as well as your livestock. Use a container, please.


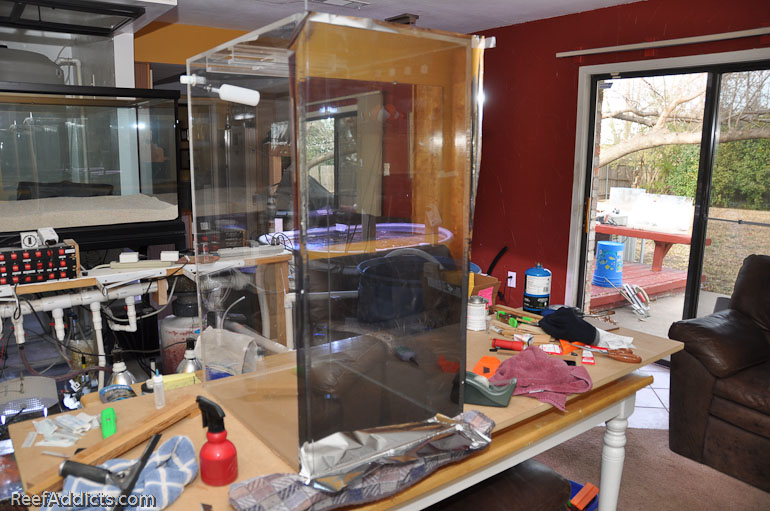
I had some window tint in my garage and decided to apply some to the panel that faces the refugium lighting to avoid algae growth in the reservoir. You can see the film hanging off the edges that I had to trim off.


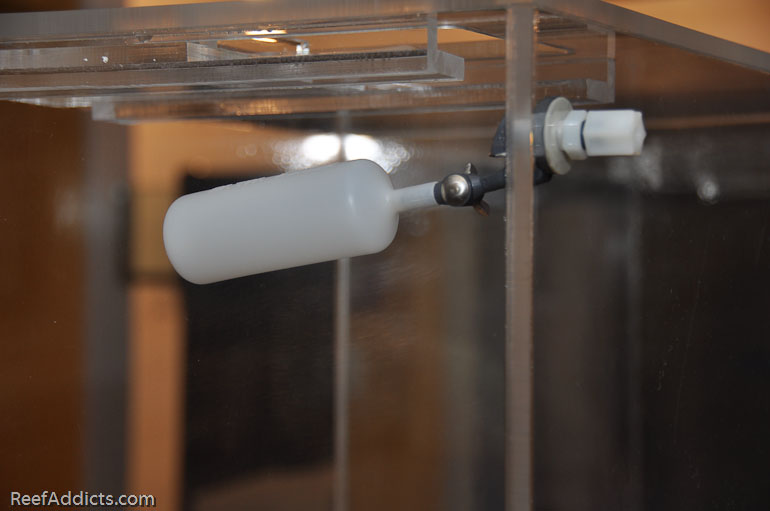
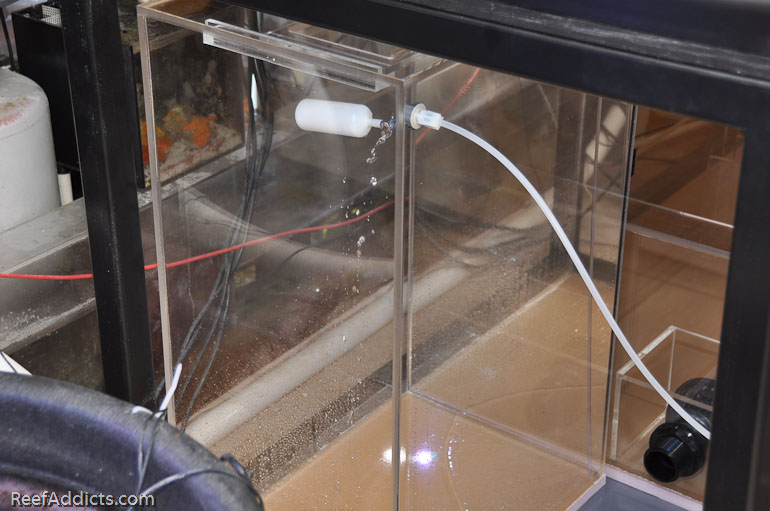
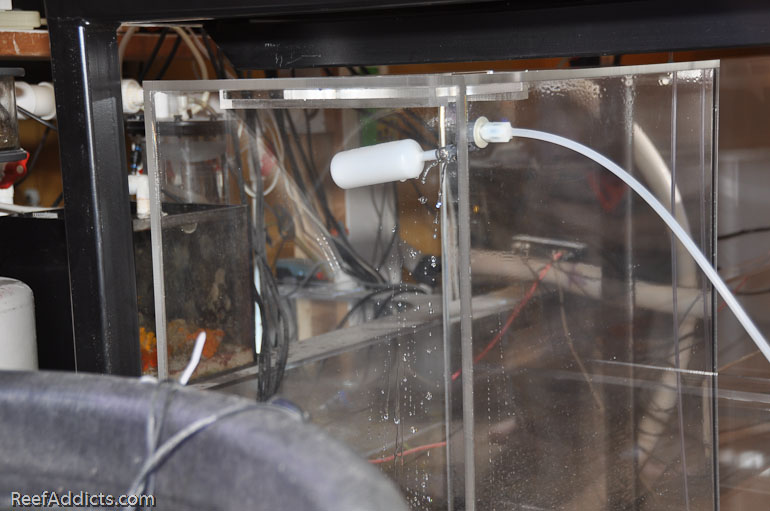
The float valve is available at USPlastics.com


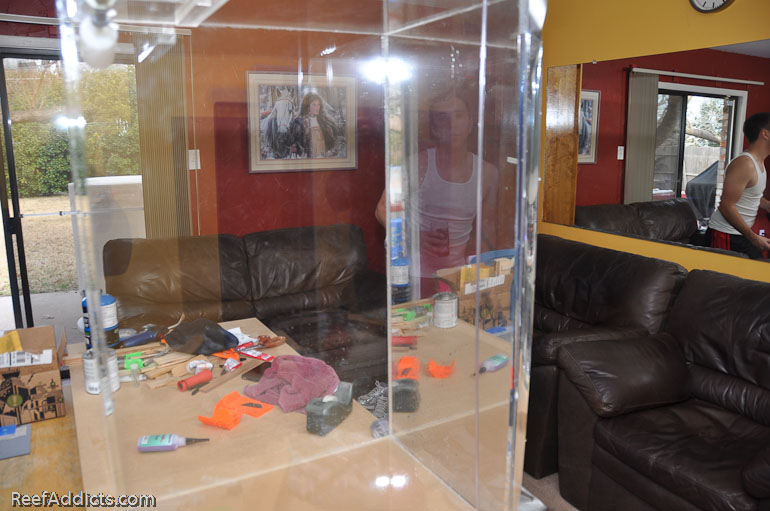
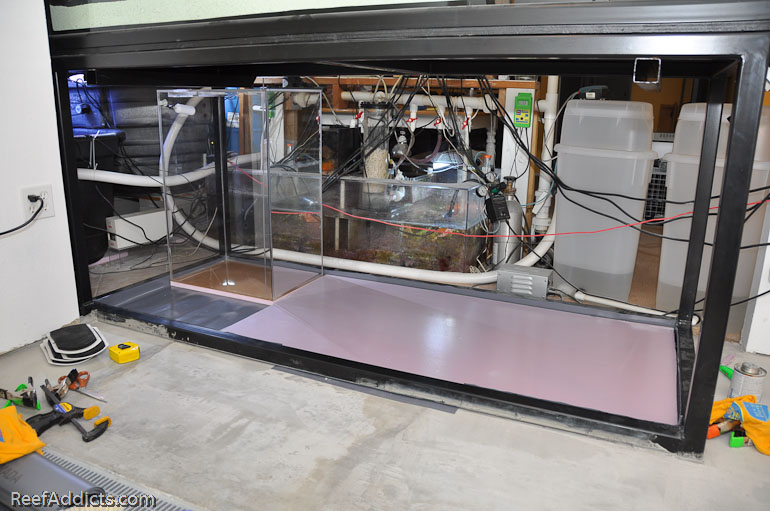
As I slide the ATO reservoir into place, I realized just how ambitious I was. This isn't coming out any time soon, once everything else is installed. Matter of fact, if it has to come out, it'll be done with a saws-all.


There isn't even enough clearance for me to squeeze a finger between the top and the steel tubing. Oops.


Connecting the water supply to the float valve, I was in business.


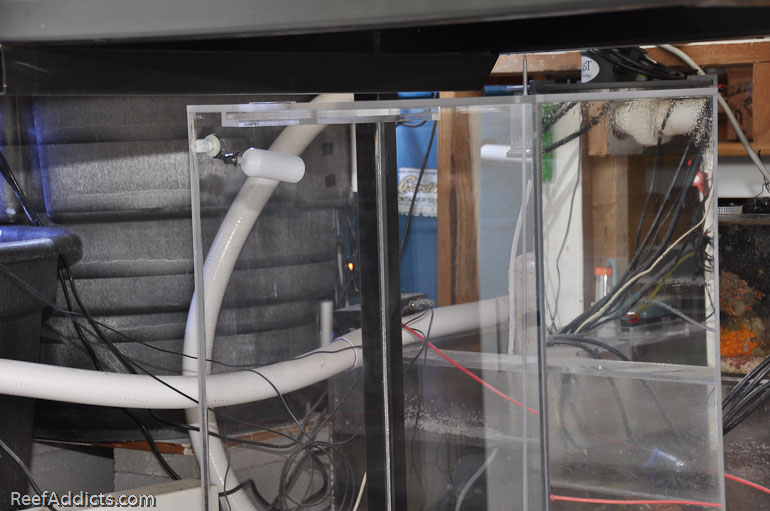
I didn't time how long it took to fill up, but it seems like it took over 7 hours. It holds about 45g of water. While that was collecting, I played with the new Dart pump and some plumbing fittings to get a better idea of the plumbing project.


Once the float valve rose, it pinched off the line causing back pressure to shut off the Boosted RO system. At that point, I close an inline ball valve to prevent it cycling back on. This avoids TDS creep and keeps the RO system turned off until I decide it should be on.


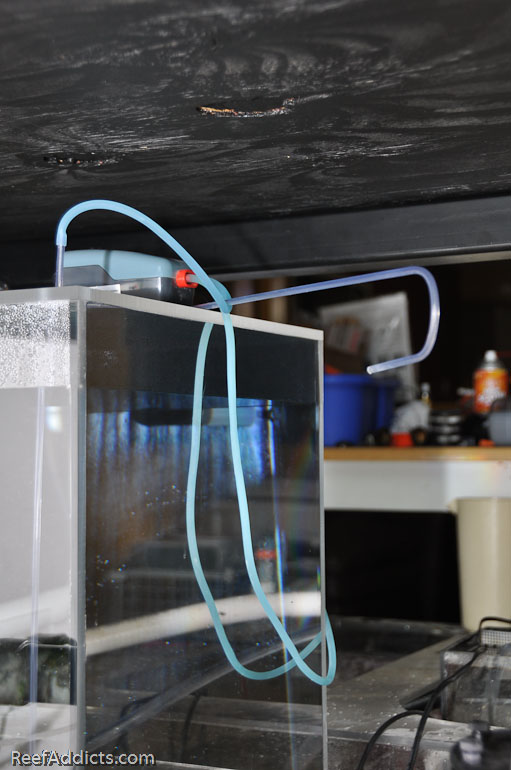
Water is pulled out of this container via 3/16" rigid tubing using an Aqualifter pump. Then it trickles RO/DI water into the sump. When the float switch rises, the pump shuts off and the flow of water stops. I like the Aqualifter because it can only move 3g per hour, and only uses 3w of power. In this next picture, you can see how I have it set up for the moment. I still need to finalize the tubing in its permanent secure orientation. It is important that the tubing's outlet be higher than the water level in the reservoir to avoid siphoning out more water after the pump shuts off.

Submit "Custom Auto Top Off Reservoir" to Digg Submit "Custom Auto Top Off Reservoir" to del.icio.us Submit "Custom Auto Top Off Reservoir" to StumbleUpon Submit "Custom Auto Top Off Reservoir" to Google

Updated 02-04-2011 at 05:18 PM by melev

Tags: ato
Categories
Plumbing , ‎ DIY projects

Comments

  1. Jnarowe's Avatar
    Very nice, but I am worried about the affect ambient light will have on your purified water. And even in an opaque cotainer, it is still very unstable. Here's an interesting test: Take drink from a glass of RO/DI water, and leave the rest to sit for a week. Then take another drink. TBH, I have never done a chemical test on the week-old water, but there definitely is a taste change. Good advice about using a reservoir. So often we here of melt-downs caused by fresh water over-doses. In my system, I started with float valves and moved to solenoids controlled by a tank computer. But I still planned as you, with a maximum flood amount that wouldn't adversely effect the system should there be an "incident".
  2. ghurlag's Avatar
    If the reservoir is more or less sealed, and the water is 'effectively' purified, there wouldn't be much of anything to feed algae growth anyway, right? I'm not downplaying the precautions, because they are a good idea, but it shouldn't be a problem, I would think.
  3. Jnarowe's Avatar
    Not exactly. Because it is purified, there are no salts to buffer the water, which makes it very reactive with the environment. And it can't be entirely sealed, or water wouldn't flow into it. This is one of those things learned over time, and in particular on larger systems where a lot of salt water and RO/DI water is held at the ready. Of course, here in the Northwest, this issue is more acute, since there is so much airborne spores and high humidity.
  4. melev's Avatar
    The window tint should help with keeping light down to a minimum in the container. If that isn't enough, I left a space to slide in a solid partition. The top access door isn't air tight, but it is good enough that when I see a temperature change in my home, the upper section of air gets a tad foggy.
  5. dread240's Avatar
    damn, I thought my 15g food barrel for an ato was kinda big... but then again it's a 75g tank versus a 400g tank lol
  6. canyousee's Avatar
    Melev I see how the ATO gets filled from the RO/DI unit but I am tring to figure out how the H2O getts from the ATO to the sump ? Thanks MIke
  7. Robb in Austin's Avatar
    I'm curious why you didn't pull it and remake it with some removal room. Heck, you could even sell this one to someone who could use it in a less confined space.
  8. melev's Avatar
    Canyousee - I'll have to add a few more pictures of how it works. There's a tall piece of 3/16" rigid tubing inside the reservoir, and an Aqualifter pump is connected to it. It draws up the water and then pumps it out flexible tubing into the sump. A float switch in the sump activates that pump as needed to replenish evaporated water.

    Robb - don't you think this project has dragged out long enough as it is? Plus who wants to pay $200 for an ATO container? hehe It isn't like I just knocked it out with 1/4" material in 20 minutes. It's a beast. It should last a good long time.
  9. Robb in Austin's Avatar
    LOL. True enough!
  10. Turbosek's Avatar
    As a precaution, I "painted" clear epoxy on all of my float valve bodies. I use 5 different ones throughout my QT and DT sump and ATO gravity feed systems. I did not want to take any chances with a leak forming in the float body, and having it not shut off. As a secondary back up to an overflowing ATO container, I plumbed in a 3/8 tube about 1/2 inch above the desired water level...that runs to a drain. That way if I ever forget to shut off my RO/DI system when refilling my container, and the float valve fails, the water will just run to the drain. Great job Melev.
  11. melev's Avatar
    Can you post some pictures of what you put on your float valve bodies? The entire thing, or just the plastic float section?

    Great idea about the overflow drain.