dread240
update on the 29 gallon and refugium
by
, 05-17-2010 at 03:25 PM (1588 Views)
First off, sorry for the poor pictures.. I really need one of those fancy cameras like marc has... I swear people with cameras like that and the know-how to use them can make anything look amazing.
So my switch over to a reef tank has had a few bumps... I've lost some corals (mainly acro's... which I've heard may be from chemical warfare thanks to the nephtya) but it's really starting to shape up. Water parameters have been rock solid for the past 4 weeks, and I'm even noticing new growth on some of them. I've added new equipment, and fabricated some of my own, so I'm quite pleased overall.
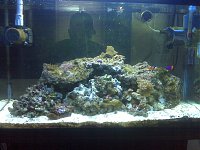
Full tank shot of right after the initial changeover.. with 1 of the new lights on the tank (current usa nova x2... 48w of t5 lighting)
I was dealing with some quite annoying micro bubbles from the bak pak shortly after redoing everything. I was also experimenting with a cheap condylactus anemone to see if my lighting was sufficient and a partially dead green star polyp down on the substrate... Friend tried it in his tank and it wasn't doing so well (he tried to start a fresh tank and throw corals in it right away) so I took it off his hands. The condylactus started to decline so I ordered another light fixture to increase my lighting.
I then screwed up and went out and bought a few corals... a few of which I have lost since then, but the ones that survived and are running on the new equipment now are thriving. I had been battling phosphates and nitrates for awhile... so I decided to build a reverse photo period refugium to hang on the back of the tank. I wanted to make it as big as possible to increase my water capacity.... ended up with about 6 gallons of space... which on a small 29 gallon tank is a 20% increase in water volume! Not bad for a hang on the back overbuilt filter :-P
I ended up building it so that only 1 line had to be ran to it for the feed. It's powered by a small mag drive.. plumbed inside, and then I made a cascade on the other side of it so that the water pours back into the tank. The added water disruption aids in gas exchange, and provides a very very nice power head like down draft down the middle of the tank. The clown fish absolutely loves to swim up to the top of it, and then shoot down towards the live rock. Least I'm pretty sure he's having fun playing in it, or he's that stupid to do it again and again and again. The refugium got stocked with about 5 inches of live sand, some live rock rubble I collected from the main display tank (I broke up the rock a bit more which you'll see in later pictures for better distribution... small chunks went into the fuge afterwards) and put some chaetomorph algae in there. It has a small $5 home depot clamp light on it with an energy efficient daylight bulb in it. I do eventually want to put a 20" strip light on it though to make it look cleaner across the back of the aquarium (everything is exposed.. so I'm not really happy seeing the clamp light there). I also painted the back of it and the right side black to prevent light transfer to the main tank, though in retrospect and if anybody else decides to take on a project like this... paint the bottom of it too. The sand for the most part blocks the light coming directly out... but acrylic will also bounce the light around inside of it, so light beams out the bottom of this at night around the edges.
Marc, I hope you approve of the acrylic work! It was my first time ever working with plastics... I'm generally stainless steel and aluminum using a tig welder to stick things together.
I'm leaving the tank as is for awhile now, to see how it matures without adding anything new for at least a month or two. I did recently have to start dosing vitamin c as my one zoanthid colony isn't looking so good. It started getting this brown coating on them and are not opening up fully. They're mid level in the tank with 96w of t5 ho lighting on them so I don't believe it's a light issue unfortunately. Here's some pics of the inhabitants though!
3 FOR 1 DEAL! My True Percula clownfish, lawnmower blenny, and frogspawn all in one pic! The 2nd picture was that same frogspawn right after I got it... I'd say it's about 25% bigger these days then it was.... and I'm not 100% sure but it kind of looks like it's growing 2 new heads as well too from down on the stalk (kinda poking out the side a bit)
Pulsating Xenia... $10 from LFS
Green Nepthya... I really like this coral and from what I've read this seems to be extinct in the wild. This was one of the frags I purchased from the local reefer. I'm trying to coax it into growing a bit straighter, but I've decided to leave it as is down on the substrate now. Only one side of this is green, and it twists and turns to make sure that side is facing the lights... has been this way since I got it, though it has gotten bigger with a few new stalks (first pic is the one with the bubbles on algae behind it and was recently after acquiring it, newest is on substrate) Oh and check out the really awesome red coralline on it... anybody have any ideas on how I can try and spread this around my tank a bit more?
Green star Polyp mat. I got this from a friend who bought it from Petco lol... It wasn't doing so hot in his tank... and while the center portion of it still seems kind of dead... I'm getting new growth all around the edges and it's expanding. I also have some of the very interesting green calcerous algae... I read a spot melev did on this awhile back.. Mine is growing a new stalk or two every week... so I've decided to move corals from that area and see if I can get this to expand... It's very vibrant and quite beautiful to look at.
This is by far one of my favorites... and I can see me purchasing quite a few polyps of these. Ricordia Florida. I unfortunately wiped out a specimen moving some stuff around in the tank shortly after changing over... and got a new one. This one seems to be doing great, is not scrunching up and has went from 1 mouth to 4 mouths since it went in the tank!. I'm hoping it splits soon and takes over that little corner of the rock. You can also see my unhappy zoanthids in this pic too, and the tiny bit of leftover hair algea in the tank that the hermits haven't gotten to yet.
So overall I'm happy, and I think within a year or two this is going to be a beautiful tank. I've always wanted a reef tank but thought a 29 gallon would be entirely too small... but then after stumbling across some others on the net it changed my mind.
Next up for purchase though is a really good RO/DI unit. I had been using chemically treated water and one of the API tap water filters and am just not happy with using that. Since I'm not buying any livestock this month or next I should be able to scrape it together for that, and finish putting together an auto top off unit. I've slacked a few days and not topped it up manually with being swamped at work and the such.
Anyways, thanks for reading, and I'll leave you guys with some very ambitious full tank shots! You can see how the rock work has been redone to open up the front of the tank a bit more compared to the original pics earlier on. Hope you enjoyed!