View RSS Feed

melev

Tearing out the old ceiling today

Rating: 9 votes, 4.11 average.
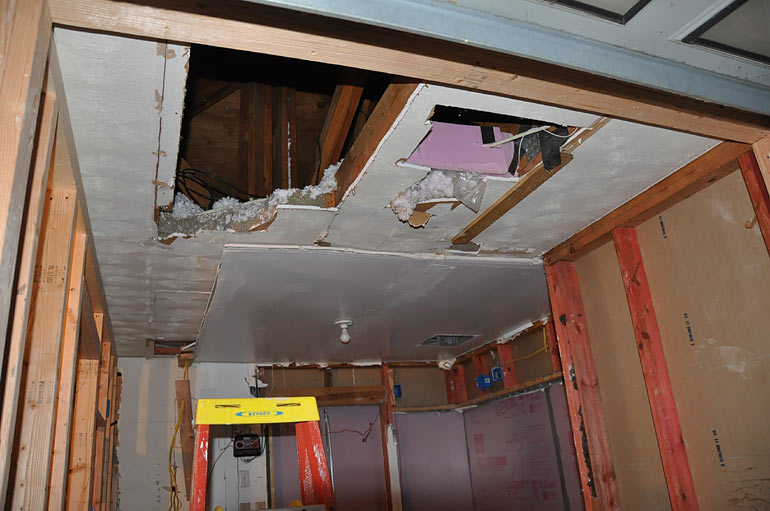
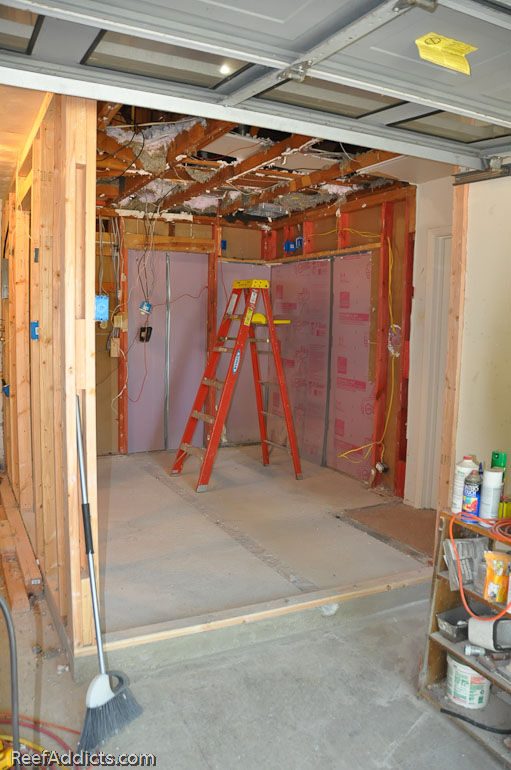
After yesterday's discussion, I decided to get that ceiling pulled out quickly before it warmed up outside. Wearing a facemask, I climbed up into the attic and played joust with a whisk broom vs the fluffy stuff. It grudgingly abated somewhat, but not all of course. Here's where we left off yesterday...


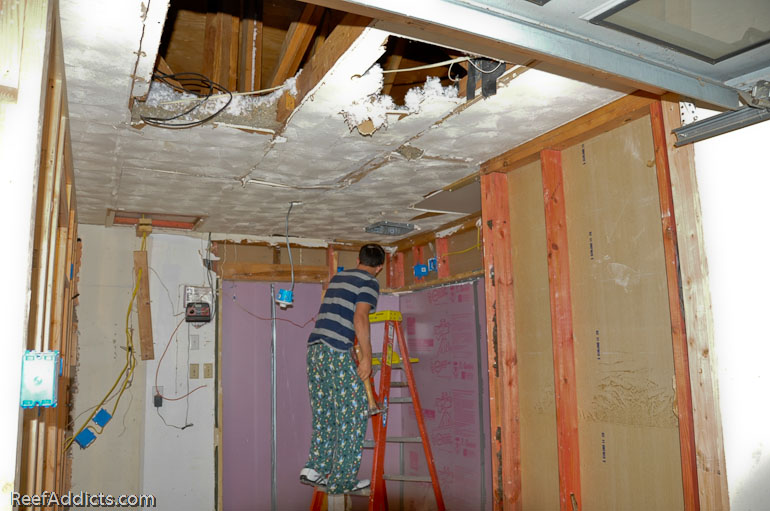
My son joined me in the actual teardown of the two layers of sheetrock, exposing the joists and raining down insulation, bits of unused wiring and cancer-causing dust no doubt.


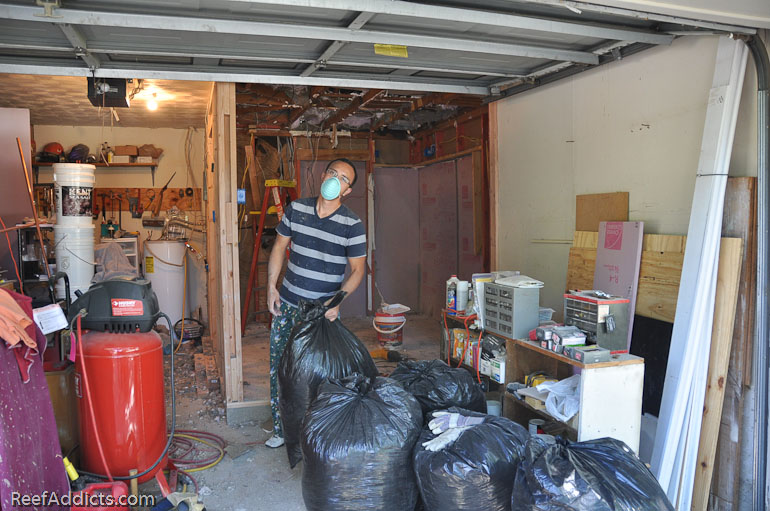
We scooped up 5 trashbags of insulation which I probably will carry back up into the attic once the new sheetrock is in place and spread it out. Whatever is lacking, I'll use the roll-out insulation instead.


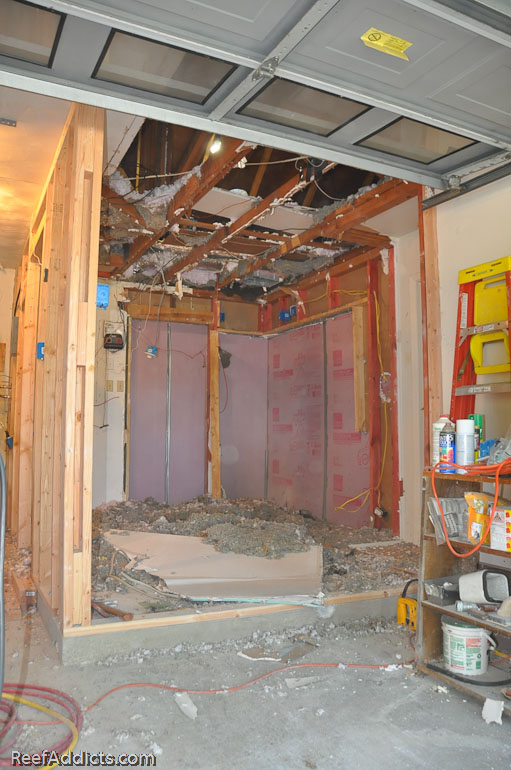
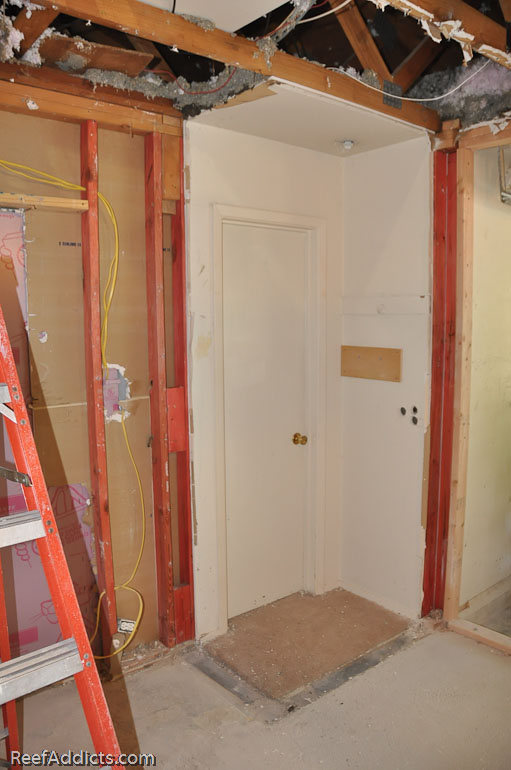
The closet was torn out. This image is almost homey. LOL


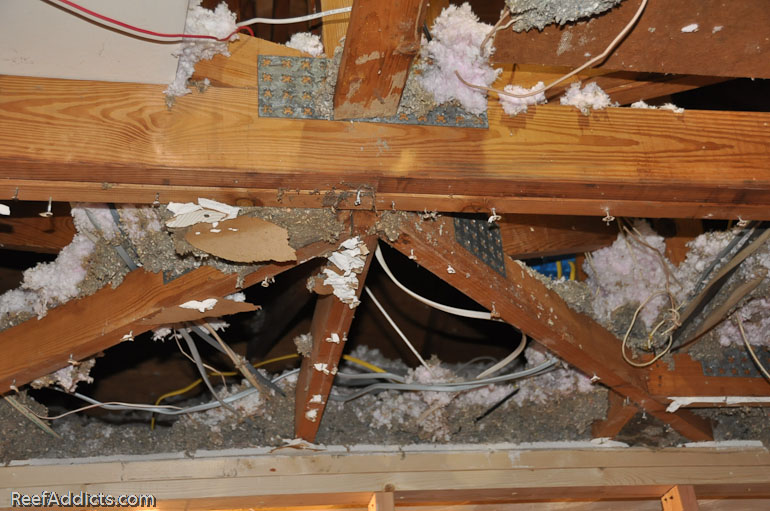
I noticed that this intersection of joists has dropped down. I'm going to jack it back up, and drive some lagscrews through the lumber to tie it together better.


This is very likely why I've observed some shifting in the garage area and why the sheetrock has been slowly giving way over the past few years. I've been scabbing the ceiling with wooden strips to keep it up before it falls due to gravity.


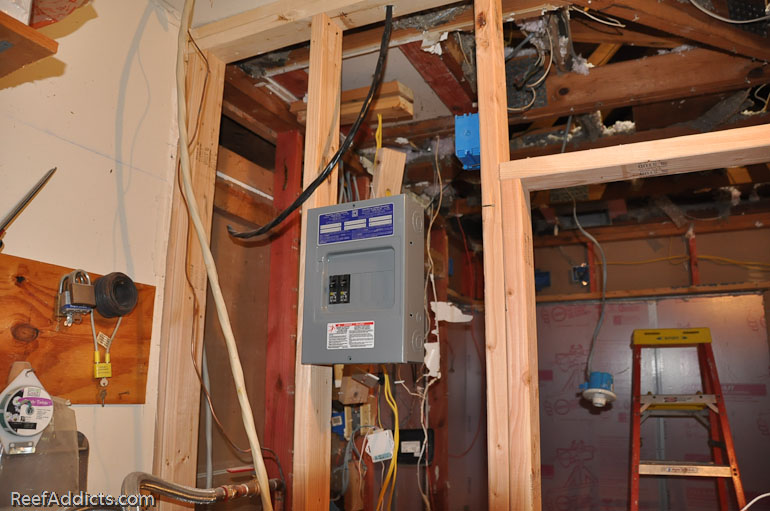
The subpanel is in place, to the left of where the window a/c unit will go. I tried to make sure it was accessible but still stays dry. Had I put it closer to the a/c unit, water might have gotten on it. I faced the subpanel into the garage area instead of the fishroom to keep moisture out of the panel from any humidity issues. I bought a special drill bit that carved a 1" hole through the 2x4 plates above.


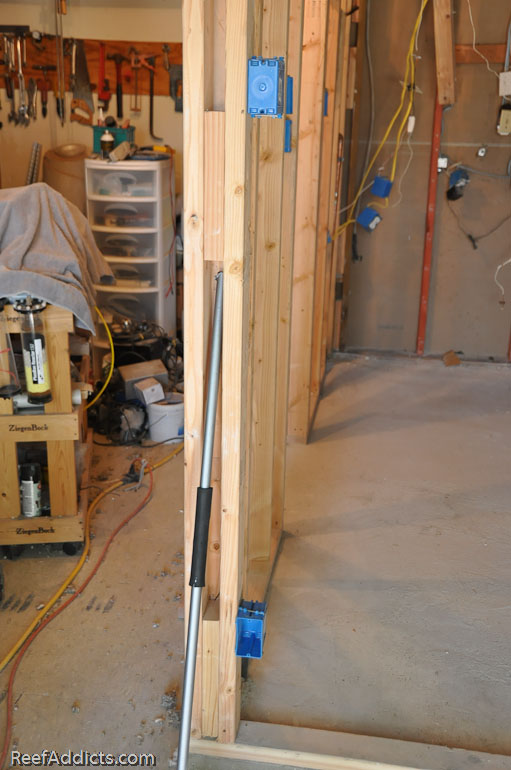
Some electrical boxes are nailed into place where I'd like power.


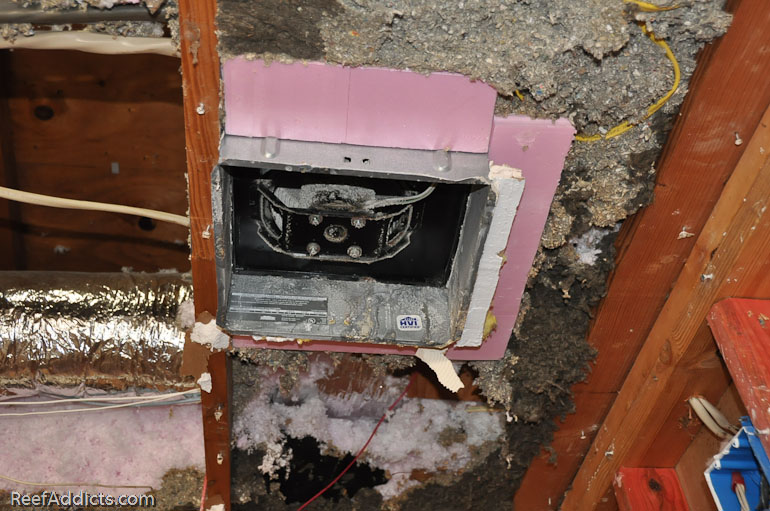
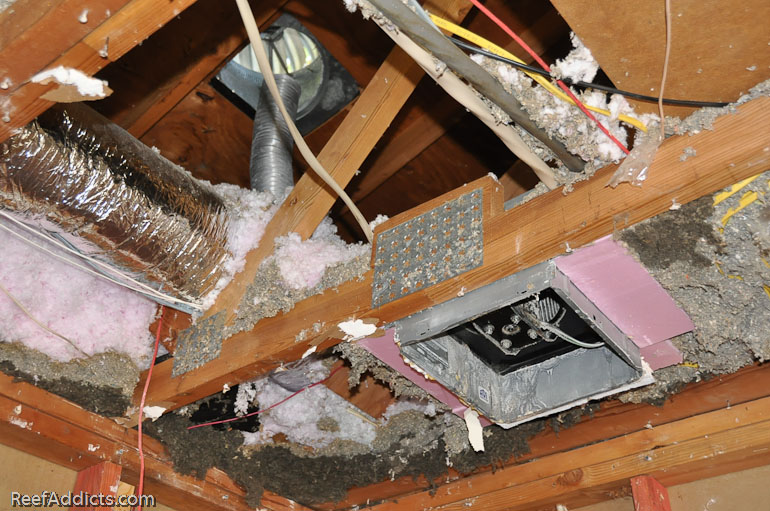
The old vent fan used to be directly over the tank. I'm going to move it over the open area so if anything drips out, it hits the floor and not my lighting nor in the tank.


You can see the rigid vent pipe I used from the fan up to the whirly-bird on the roof. This exports heat and humidity out of the house.


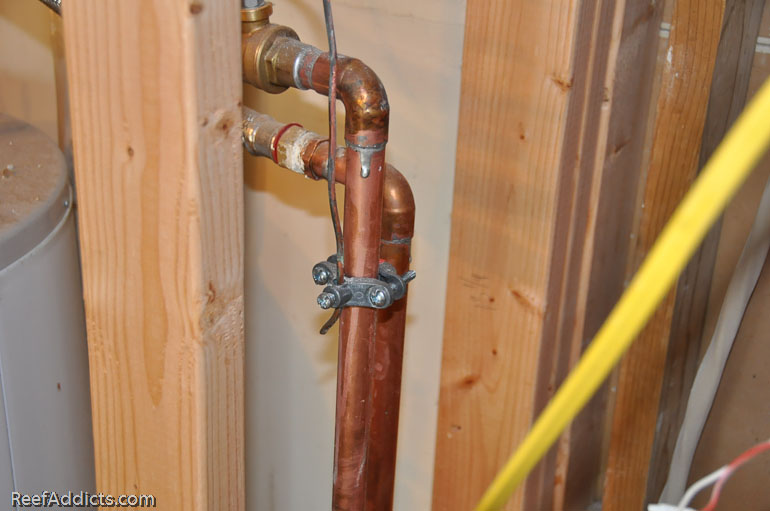
The ground wire is connected to the cold water pipe going to the water heater. Had to buy a new clamp to get this done.


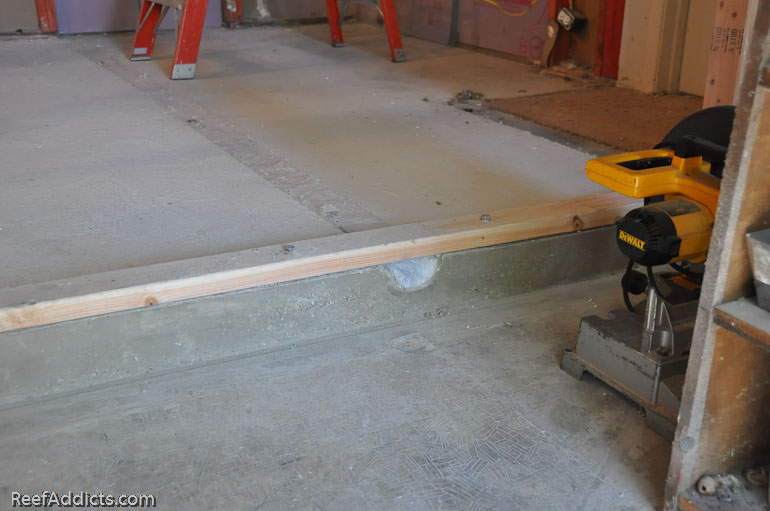
Here's the end of the french drain, unfinished.


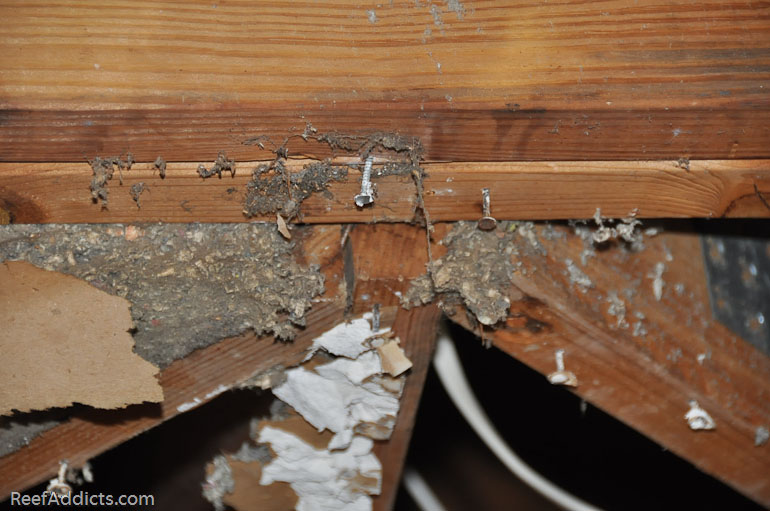
Once the low spot is moved back into place and all the screws and nails are stripped off the joists, and after any new wiring has been run across the ceiling, the new sheetrock will be installed.

Submit "Tearing out the old ceiling today" to Digg Submit "Tearing out the old ceiling today" to del.icio.us Submit "Tearing out the old ceiling today" to StumbleUpon Submit "Tearing out the old ceiling today" to Google

Tags: sheetrock
Categories
DIY projects

Comments

Page 1 of 2 12 LastLast
  1. NightShade's Avatar
    Work work work, LOL. Looking good though.

    Looks like you had two layers of insulation up there, some new light fluffy fiber and some old cellulose stuff. And is it me or was some of it wet?? May take a small handful of the cellulose stuff and do a quick self check of it's fire retardant abilities, basically take a lighter or something with a good flame and see if it will ignite and burn or just smolder a bit. If it burns throw it out and spring for a little new if not re use it if its not wet. The blown in insulation like that stuff has to be fluffy to insulate so if it all packs down hard then it's not as good an insulator. Good idea using the existing roof vent to vent your fishroom out though but in colder weather it may get condensation on it from the warm moist air touching cooler metal.

    You may also get some sort of frame built for your walking boards in the ceiling now so that your insulation under the boards isn't compacted down, and use some sheetrock or plywood to make a box around your opening to go into the attic to keep the insulation from falling through. Will be much easier to do without the sheetrock in place.
  2. melev's Avatar
    No, it's not wet at all. I pumped some in 6 years ago, and then the white stuff maybe 2 years ago. I just want to be sure to get plenty up there because it helps with my electric bill. Even with the 280g, in the summer months with a/c running non-stop in the fishroom and the house, my bill never got over $240. Reusing this stuff doesn't bother me, and I still threw out some.

    I'm probably going to insert some planking up there just for safety reasons, and I too was thinking about adding some type of 2x8 or 2x10 perimeter woodwork around the access point to keep the stuff in the attic and avoid it falling down in the future when something needs doing up there.
  3. johnbanks's Avatar
    looking good Marc, its going to be perfect when its done

    John
  4. Alaska_Phil's Avatar
    Ahhh...the sweet feeling of demolition!
    Quite the project you've got underway there Marc. And I thought your original 14 day build was impressive.
  5. Jnarowe's Avatar
    Holy Crap!

    What a wild intersection...

  6. Trido's Avatar
    Your grounding clamp has me worried. You may want to replace it with a brass one in order to preven electrolisis which will corrode the copper pipe over time.

    Ya, its quite the corpuscle of a roof truss intersection. Good luck nailing off your sheetrock in that area.
  7. melev's Avatar
    Oh yeah? Didn't even think about that. I'll have to trade it in - thanks for catching that. Since the pipe is copper and so is the wire, I might as well get the right connector.
  8. Trido's Avatar
    Your moving right along. Too bad I couldnt be there to help out. Believe it or not, I like projects like this.
  9. Bobbywade's Avatar
    The pipe ground clamp is just fine they have been using them for decades with no issues
  10. Alaska_Phil's Avatar
    Marc, what's the other end of the ground wire hooked to?
  11. Bobbywade's Avatar
    The ground bar in the breaker box it's the cold water pipe earth ground.
  12. NightShade's Avatar
    I would assume that this is just a secondary ground anyway another line should be ran back to the main panel which is likely connected to a grounding rod outside, but galvanic corrosion can happen with dissimilar metals in contact with each other.

  13. dahenley's Avatar
    Marc, you mentioned jacking up the joists and drilling and lag bolting it together to prevent sag, but i wouldnt just do that. i would get some 3/4in Plywood, and some Liquid Nails or some sort of adhesive, and cut strips as wide as your joists. then jack it up, and glue the Plywood on the Joists. )Plywood is super strong when put on its side due to the lamination of the wood.) then screw (not nail, as nails can pull out unless you get dipped jagged nails) the ply to the joists, and then you could drill and lag everything together.
    it will only cost you the money for a sheet of ply, and 2 tubes of glue.
    just another thought to add..... it deff wont hurt!
  14. melev's Avatar
    I have the plywood already on hand (new, 3/4" thick) - so are you talking about vertical or horizontal use? You said joists, so I'm thinking horizontal across a couple, on the upper side correct? I have to keep the bottom clear for the sheetrock.
  15. dahenley's Avatar
    laminate it vertically. (glue one on each side of the double 2x8's. im assuming those are the ones your talking about sagging? right?))
    (im no carpenter, but i have done some home improvement and built 2 houses with my dad. so i only have general knowledge. if there is a GC or a carpenter around, maybe they can chime in??)
    i hope that makes since..

    if your trusses are starting to sag, you can get simpson straps and lay 2x6's perpendicular to the joists and screw everything together. that will distribute the load across everything and help pick up those areas between your load bearing walls.
    just another option...
  16. dahenley's Avatar
    sorry marc.... i see the board hanging down below the double 2x8's.... (on the other side.)

    for that, you could lag through the double beam, but i would look into using the simpson straps and using 2x4's or 2x6 perferably to help distribute all the weight..

    and this is the closest thing i could find to the brackets i was talking about
    http://www.strongtie.com/products/connectors/TS.asp

    and i found this which would be helpfull as well
    http://www.strongtie.com/products/ca...ti_member.html
  17. melev's Avatar
    Okay, I'll take a good hard look at it tomorrow. What I want to do is lift that one section that is 1" lower, and tie it all together. If some additional plywood reinforces the area, that's fine with me. I think some lag screws are key, primarily.
  18. marks69's Avatar
    i wouldn't run your vent out like that. buy a sealed vent you can hook the duct up to. i've had to replace customers whole roof because of mold due to the same problem. a vent is cheap and easy to install. you can also rent the blower for the attic insulation at most home depots and other hardware stores. also look for a joist hanger.lol
    getting there
  19. melev's Avatar
    I've been running it out the whirly bird for the past few years without even a hint of mold or issues. It really appears to be fine.

    My roof is 10.75 years old and eventually will need replacing. That'll be when I add on the second story. MUAH HA HA... j/k

    I've rented a blower twice for insulation, but hope I can pass on it this time with this project.
  20. canyousee's Avatar
    It never fails you start one project which leads to this and that and before you know it 1/3 of the house is redone. Doing a fine job the new and improved fish room will rock.
Page 1 of 2 12 LastLast