It’s the sound no one wants to hear. It’s the visual we pray will remain only a dream. It’s the fear we’ve often considered, all the while hoping to outwit this worst case scenario with every ploy conceivable.
Even with the most careful planning, time marches forward. Hour by hour, pressure stresses and tugs at the very seams that hold your reef tank together. Gravity is relentless, and age tears at the surfaces above and below the water, weakening the aquarium. Warranty or not, eventually something is going to give. What you do next dictates how this dance plays out.
I can’t help but wax poetically about the recent shift that my reef tank took. I put a lot of time, pride and money into making it the beautiful piece of the ocean it was, only to discover a seam failing. With the carpet gradually absorbing more and more water, my reef slowly began to “bleed” to death. The fish swam about unawares, just thinking about their next meal. The corals were growing quietly, swaying in the current, blissfully ignorant of the enormity of what was to come. And all the while, their caregiver was trying to determine the best option under the circumstances.
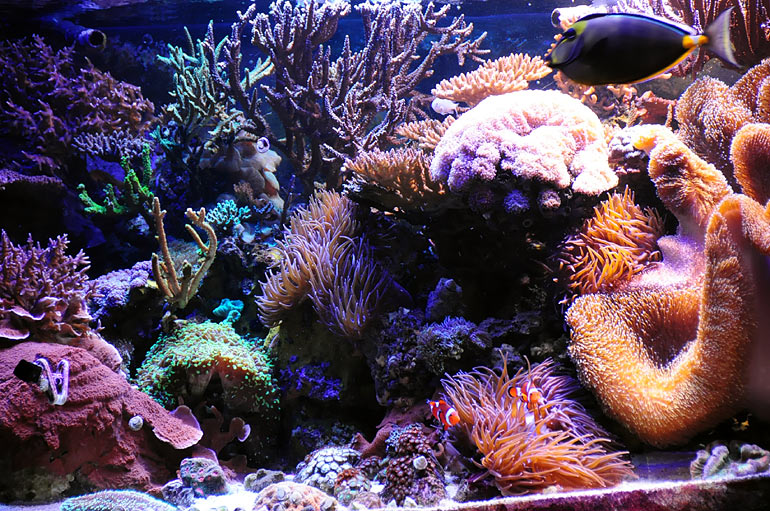
This is the story of the end of my 280g reef. It was going to turn six years old in 50 days, still well in its prime. Corals were thriving, intertwined and yet tolerating one another for the most part. Some were losing ground as their closest neighbor gained another inch or so. The water was sparkling, the parameters perfectly suited for their needs. Yet their home, the 37.5 cubic feet they shared, was letting go. Below, a bunny was cleaning himself, without knowledge of the impending rush of water that was likely to pour his way had I not noticed the wet area spreading nearby. Perhaps I should be grateful for the 2141 days that those seams held, instead of feeling the loss so strongly. Fortunately I was home when this happened. After all, I was scheduled to be in Austin that weekend.
On July 2nd, as I was heading out the front door of my home, I heard my shoe squeak slightly on the tile. We’d had a great deal of rain and I dismissed it, thinking my carpet was a little moist from recent foot traffic. On July 3rd, the squeak was far more pronounced, causing me to pause. Fighting back my dismay, I quickly studied the angled-front 20-gallon tank in the entry, but all was dry as was the tile beneath. I checked inside the adjacent closet to see if the plumbing was leaking, but it too was as it should be. Walking backwards slowly as I felt the carpet with my fingertips, I tracked the wetness back to the left column of the woodwork that wraps my 280-gallon reef. Pulling off the front cover, I discovered the woodwork was wet, with puddling on each horizontal shelf that held its structure together. Concern swept over me as I looked at the corner seam of the tank, my eyes and fingertips tracing up the silicone to discover the source of the leak. Water drops rolled down the side like clockwork, and I saw a gap in the silicone about one inch beneath the waterline. It didn’t look bad, but it definitely didn’t look good either. Any leak is unacceptable.
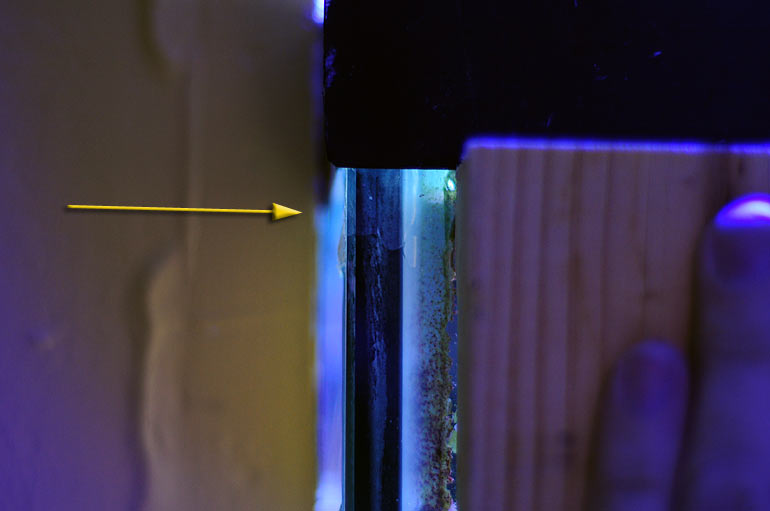
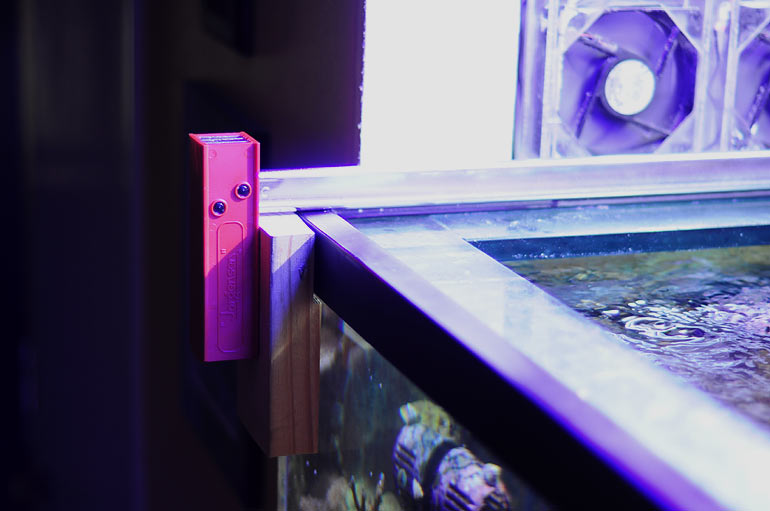
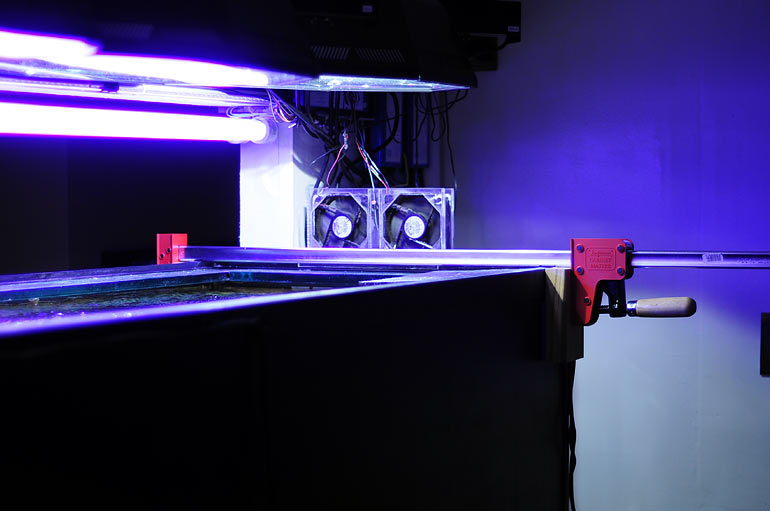
I ran up to the local fish store to give the owner my news, and asked him to start getting me some numbers for a new tank, and from there I went straight to Home Depot to buy some giant clamps to hold the tank together. $90 later, I had two 48” heavy duty clamps and a tube of silicone. I hoped to secure the area and mend it with new silicone. Upon my return, the first clamp was placed over the top of the tank, but I could see that the trim on the tank was going to interfere and put uneven pressure on the glass when the clamp was tightened down. For the front of the tank, a 2x4 block was cut and notched to match the profile of the trim, and secured with some double stick tape. On the backside of the tank, a matching 2x4 block was held in place with a small piece of acrylic to fill a gap, and the clamp was tightened down cautiously. A few trips back and forth allowed me to view the joint as I slowly applied more pressure until it seemed secure.
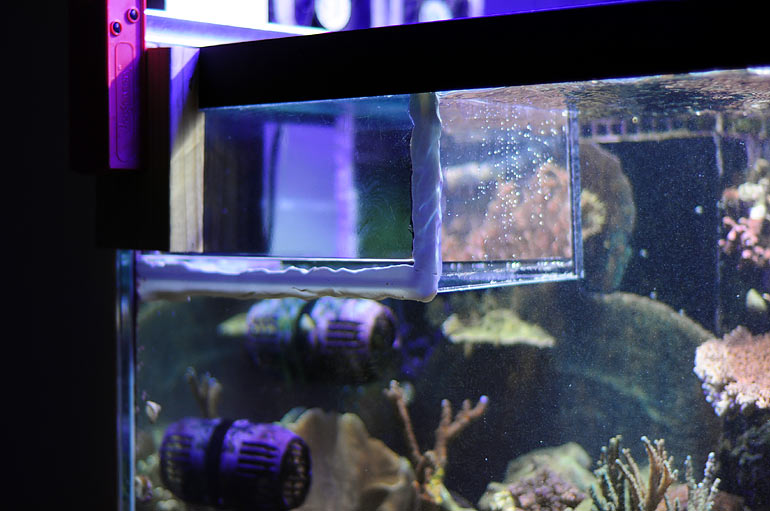
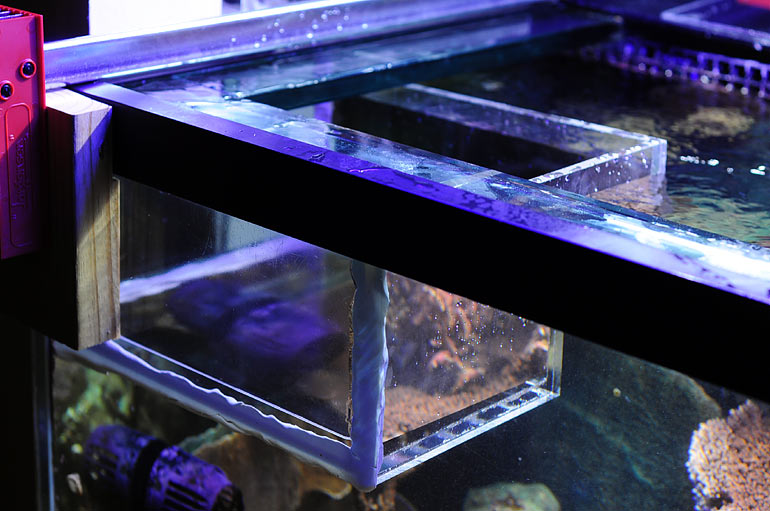
I built an acrylic box to fit into the corner to create a dry zone. The box had two sides and a bottom panel, and it had to be big enough to give me room to work in. The idea was that if I could make a good seal with some gasket material, the euro-bracing would stop it from bobbing up as the water pressure held it in place. The box was made with 3/8” thick acrylic, measuring 10” x 8” x 6”. I let this cure for about an hour, and hoped that would be long enough and not come apart. The corner where the bottom panel would press into the existing silicone was rounded over to get a good fit. The only material I could think of that might work as a gasket was plumbers putty. I rolled it out a ¼” thick and cut it into ¾” wide strips with a pizza cutter. The strips were then applied to the vertical and horizontal edges of the box where it would push up against the glass.
The box was lowered into the tank and pressed into the corner. Siphoning the water into a nearby container wasn’t draining the box fast enough to create the suction needed, so I used a plastic cup to quickly bail out as much water as possible, dumping that back into the reef. The resulting vacuum allowed the water to press the box into place. I had to work the putty in a few spots to maintain a good seal. I didn’t know if the putty would be problematic to the livestock, but weighing that risk against all the water dumping out at once, it seemed like an acceptable risk. The putty didn’t dissolve in the saltwater, nor did it feel slimy or create a milky film. I knew the majority of the putty wasn’t exposed to saltwater since it was either inside the box or sandwiched between the glass and acrylic, leaving only a narrow leading edge in direct contact. It worked out well, and I continued to observe the dry area for a few hours to see if it would hold or if the water would rise within the box. pH and ORP remained unchanged, and the protein skimmer didn’t react to the putty. The RO/DI system was turned on to start making saltwater that was most certainly going to be needed.


 Menu
Menu


Reef Addicts Message