

baker.shawn
DIY LED fixture of fun (SOL rip off) part 3
by
, 04-05-2011 at 04:16 PM (2700 Views)
For those of you who missed them here are my previous posts
Part 1-- http://www.reefaddicts.com/entry.php...n-(SOL-rip-off)
Part2-- http://www.reefaddicts.com/entry.php/1489-DIY-LED-fixture-of-fun-(SOL-rip-off)-part2
Allot of progress has been made since my last update, I moved rather quick and didnt take many pictures between steps, i have been encountering many miscellaneous costs which has put me WELL over budget i estimate im pushing 600 currently, however im almost done.
Here is my updated sketchup! (imagine a very thin sheet of glass over the acrylic)
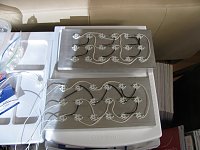
My first adventure was drilling my heat sink, it well surprisingly well with the drill press, the drill bit had no problem getting through the metal, the hard part was using the self tapping screws they were extremely hard to get in, I had 72holes and went through more than 100 screws, I just kept stripping the heads. Next time I will be buying a proper tap set
Once the holes were pre-taped by the screws the LED installation went smooth, i used a small dab of thermal grease on the back of each Cree and secured it down with 2 screws, each screw also had a nylon washer between the LED and the head of the screw to prevent shorts
Wiring was a bit of an adventure; I had never soldered before but had seen my dad do it many times for me as a kid. The first couple were rough but after that I had a technique down. I applied all the solder I would use to the wire, lay in on top of the terminal on the LED and touch it quickly with the tip of the soldering iron and presto!
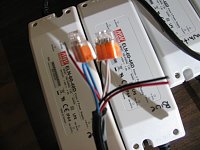
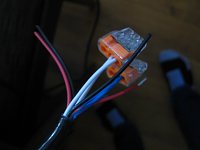
After wiring the LEDs ,my attention turned to the drivers. My dad who doesnt really like my aquarium insured me that i would be swiftly removed from the house if there was any type of reef related electrical fire lol....GREAT . I wired up the 120v inputs to the 4 drivers using wire Nuts, Im using 1 power cord for every 2 drivers so 3 wires pre nut was kind of sloppy and didnt make me feel very safe. So i went wandering at Home Depot where i found these cool 3way wire connectors i decided they would be better to use(they also sell 4way connectors) all you have to do is push in the wire and it clamps down on it.. Success input was complete! (I may put the junction in to a project box to protect it from moisture) thoughts?
The next step was wiring the output and dim+/-. There really isnt too much to do here, since the drivers are grouped blue and blue then white and white I used the 3 way connectors on the dim+ and dim- wires so they can be controlled as one unit. The +/- from the drivers to the LEDs are going to have connectors on then, i just havent gotten around to it yet. I bought some but they are far too tough to get apart once connected
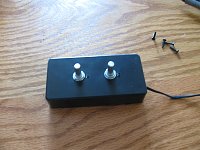
Yesterday i began construction of my Dimmer control box, it consists of 2 10k pots, a project box and a 9v@500ma DC wall wart. The guy at the electronics store couldnt get me a 10v wall wart, I dont want to order it online so it will have to do. I dont plan on this dimmer being permanent anyways. Its not totally complete yet but here is how its looking.
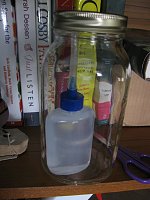
I went to the acrylic store today to see how much it would cost to get the housings made I was told about $25 each....I was okay with that but asked how much it would be for the materials to do it myself, I told him I was fairly confident with welding acrylic, the guy went to the back to look for scrap and came out with a 16x36 sheet of black acrylic ¼ thick (he didnt have any white) and a hypodermic bottle of liquid solvent. All for $20 cash.... that basically made my day! Because now I have enough acrylic for a new project! (If youre wondering why my solvent is in a jar its to prevent evaporation, the guy told me to do it)
Anyways Im currently in class (politics of the plate) so I should probably get back to paying attention! Im going to update my design on sketch up and add it to the new pics


